best way to clean a linoleum floor

Restoring a Linoleum Floor is not that hard. Lets get down to the details. Your old linoleum floor is in rough shape. It has a bunch of fine scratches, a few gouges and has lost it’s lustre and pizazz. Its always best to start with a proper cleaning of a floor with plenty of elbow grease and a coarse cloth or even a very fine abrasive pad. Using the typical linoleum cleaners at full strength rather than the typical one ounce per gallon will do an amazing job of cleaning a floor of all its accumulated dirt and grime. First thing everyone trying to restore a linoleum floor should verify is that the floor is actually linoleum and that it is not vinyl or laminate flooring. How would you know? It would be best to take some sandpaper, the finer the better and go to a spot that would be hidden by furniture or appliances and begin a fine sanding of the area. If the color layer on the flooring is not wearing through and has color at least halfway through it’s thickness it is likely to be linoleum.

Ideally, if there is a spare or loose piece of the flooring somewhere it would be linoleum if it has a grid of jute as the backing. The flooring is very pliable and has a pleasant natural odor rather than a chemical or plastic petroleum smell. One of the last clues that might help tell what the material is, would be to see if it installed in a width of greater than 79″ because linoleum is so heavy that the rolls can only be two meters wide. Once we are sure the flooring is linoleum, we can go about lightly sanding the floor by hand, ideally with a scrub pad or very fine sandpaper, the whole time paying careful attention not to spot-sand too aggressively in any one place. An area that may have been worn under a desk chair may take a bit of elbow grease to get the scratches leveled out, but true linoleum if carefully and uniformly abraded will prepare beautifully for refinishing. The process is actually a form of screening and polishing. Industrial floor machines can also be used on linoleum to remove existing finishes, remove scratches and nicely prepare a floor for refinishing but extreme care must be used not to burn through the color on the flooring.

Once the floor is leveled out with all the scratches gone and presenting all as the same uniform color, the gloss needs to be restored.
best homemade stain remover for carpetsOne last item that may need attention would be to fix small gouges and if they are bad enough the only way to do that well would be to scrape some of the color layer from the flooring and to make a repair paste by mixing that dust with white carpenters glue.
used pool sand filter for saleOnce pasted in, leveled off and left to dry, the patch can be gently sanded prior to refinishing.
commercial carpet cleaning cleveland The finishing is usually best done with a sponge mop or a spreader bar and spreading and applying thin uniform coats is always the best bet.
best carpet steam cleaner rent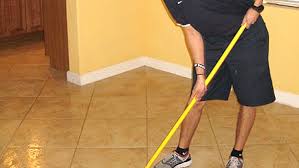
Be sure to check our other post on applying TopShield and Top Shield 2.Truth be told, hot water with a little dish detergent will clean day-to-day dirt from any flooring.
carpet cleaning chemical suppliersBut stains are more difficult to vanish and really test the mettle of DIY floor cleaners.
carpet cleaning services sacramento caTo begin my test, I created a popular, all-purpose cleaner. White vinegar and washing soda pack a one-two punch that knocks out dirt. Then I mixed them with dish soap and water to form an everyday cleaner.This is the control solution that I compared all other DIY solutions to. I then took samples of floor materials — vinyl, ceramic tile, laminate, and finished hardwood — and tried to remove Sharpie (permanent marker) marks with different DIY cleaners I made using the basic recipe as a base.

Vinyl is a popular kitchen flooring, so I marked it with a black Sharpie and compared the all-purpose control solution (A) to isopropyl alcohol (B). I placed a little of each cleaner on a clean cloth and made 20 swipes on each stain.The all-purpose control was a bust. But the alcohol virtually eliminated the stain in five swipes.I then wanted to see if diluted alcohol (C) — one part alcohol; one part water — would be as effective. Ceramic tile is a popular flooring for kitchens and . I compared the all-purpose control solution to a dab of toothpaste, which is known as a household polish and cleaner.For this test, I used a circle made with a Sharpie marker.The all-purpose solution took out the Sharpie circle, while the toothpaste only lightened it.I marked up some laminate flooring samples and pitted the control solution against a sprinkle of Borax on a sponge. Borax is a laundry detergent that, because it’s abrasive, takes out other household stains, too.The test was a bust. Neither the all-purpose control solution nor the Borax removed the stains on laminate.

Undeterred, I tried the alcohol and toothpaste — just for kicks.That alcohol is a great stain remover on floors and took out the stain. The toothpaste lightened it.Just about anything will clean dirt off wood floors. But removing Sharpie is a challenge, so I rounded up the usual cleaning suspects — the all-purpose control solution, straight white vinegar, hydrogen peroxide (which has many household uses), and alcohol — and gave them a chance to prove themselves.The basic homemade floor cleaner recipe (A) removed most — but not all of — the stain.The vinegar (B) did nothing.The hydrogen peroxide (C) was a bust. The alcohol (D) removed the stain, but left a haze. To remove the haze, I put a dab of olive oil on a cloth and rubbed. And the wood looked good as new.I would use alcohol judiciously on wood floors, because it can remove some finishes, such as wax and shellac. So only use in a worst-case scenario, and be prepared to beef up the finish after.Homemade floor cleaner recipes are an effective alternative to commercial cleaners.